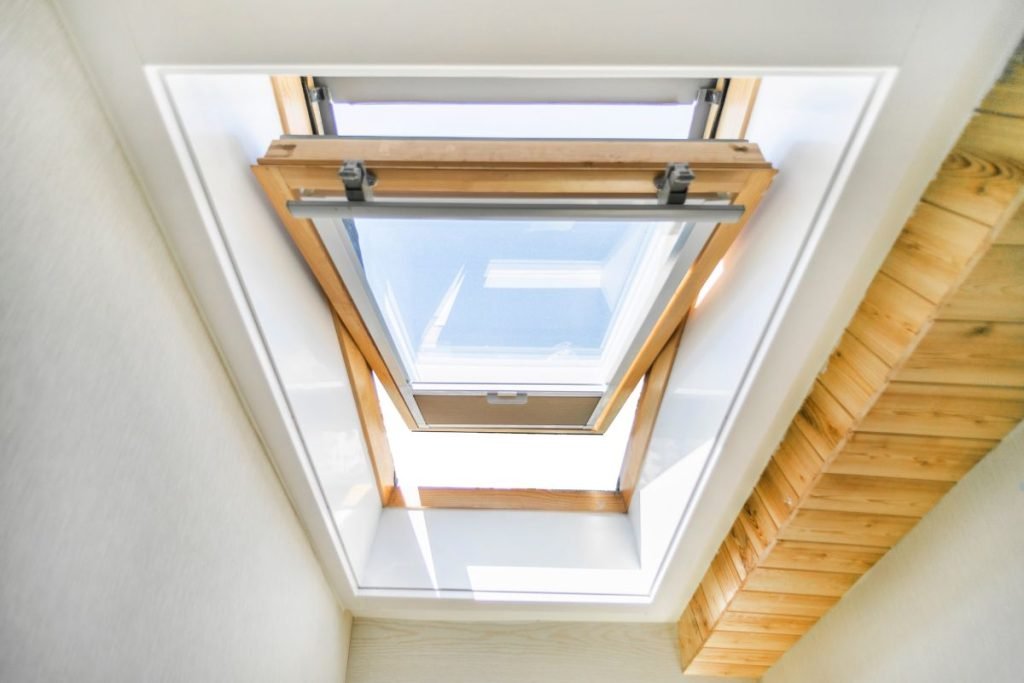
Adding a skylight to your flat roof is a fantastic way to bring natural light and fresh air into your home. This guide will walk you through the entire process, from planning and preparation to installation and maintenance, empowering you to tackle this DIY project successfully. Of course, if the thought of cutting into your roof makes you nervous.
Why Install a Skylight on a Flat Roof?
Installing a skylight on a flat roof comes with numerous advantages. Flat roofs often struggle with limited natural light, resulting in dim and less inviting interiors. A skylight offers a simple yet highly effective solution by flooding your space with natural sunlight, instantly creating a brighter and more welcoming atmosphere. Whether in your kitchen, bathroom, or living area, a skylight can dramatically enhance the ambiance. Beyond aesthetics, skylights also improve ventilation, help reduce energy costs, and even boost your home’s overall value. Imagine transforming a dark, enclosed room into a light-filled, airy retreat—that’s the impact of a skylight! We specialize in skylight installation for flat roofs, providing expert craftsmanship and high-quality materials to ensure long-lasting performance.
Planning and Permits

Before you even think about picking up a saw, careful planning is absolutely essential. Installing a skylight is a significant home improvement project, and it’s crucial to ensure you’re adhering to all local regulations and safety guidelines.
- Check Building Codes: Research your local building codes thoroughly to determine if there are any specific requirements for skylight installation in your area. These codes often specify restrictions on skylight size, appropriate placement, or approved materials.
- Obtain Permits: In most jurisdictions, you’ll need to obtain a building permit before commencing any roofing work, including skylight installation. Contact your local building department as a first step to start the application process for the necessary permits.
Gathering Your Tools and Materials
Having all the necessary tools and materials readily available before starting the project will ensure a smoother and more efficient installation process. Here’s a comprehensive list of what you’ll need:
- Safety Gear: Safety glasses, work gloves, and a hard hat are essential for protecting yourself during the installation.
- Skylight Unit: Choose a skylight that is specifically designed for flat roofs and that meets your desired size and features (e.g., fixed, venting, or tubular). Consider visiting a local supplier of skylights to see your options in person.
- Flashing: Purchase a skylight flashing kit designed for your specific skylight model and roof type. This is critical for preventing leaks.
- Sealant: High-quality roofing sealant is a must for creating a watertight seal around the skylight.
- Measuring Tools: A tape measure, level, and chalk line are necessary for accurate measurements and alignment.
- Cutting Equipment: A reciprocating saw or circular saw (with a metal-cutting blade if your roof is metal) will be needed to cut the opening in the roof.
- Drill/Driver: A drill/driver will be used for securing the skylight and flashing.
- Other Essentials: Roofing nails, screws, caulk gun, utility knife, and a ladder are also essential.
Marking and Cutting the Opening
Accurate measurements and precise cutting are crucial for a successful skylight installation. Here’s how to mark and cut the opening:
- Locate the Joists: Use a stud finder to locate the roof joists in the area where you plan to install the skylight. It’s essential to ensure that the opening doesn’t cut through any structural supports.
- Mark the Opening: Referring to the skylight manufacturer’s specifications, carefully mark the outline of the opening on the roof surface. Employ a chalk line to create straight, accurate lines for precise cutting.
- Pilot Hole: Drill a pilot hole inside the marked area to allow you to easily insert your saw blade.
- Cut the Opening: Using a reciprocating saw or circular saw (with a metal-cutting blade for metal roofs), carefully follow the marked lines to make precise cuts. Take your time to ensure a clean, straight cut for the best results. Not comfortable doing it yourself? Call us today! Our professionals are ready to assist with safe and accurate skylight installation.
Preparing the Curb (If Required)
Some skylights require a curb (a raised frame) to be built around the opening for proper installation and water drainage. Check your skylight’s installation instructions to determine if a curb is necessary. If so, follow these steps:
- Build the Frame: Construct a rectangular frame using pressure-treated lumber. The frame should be slightly larger than the skylight’s base to allow for a proper fit.
- Secure the Curb: Attach the curb to the roof around the perimeter of the opening using roofing nails or screws. Ensure the curb is level and securely fastened.
- Waterproof the Curb: Apply a layer of roofing sealant to the top of the curb to create a waterproof barrier.
Installing the Skylight
With the opening prepared, it’s time to install the skylight itself.
- Carefully Position: Carefully lift the skylight onto the roof and position it within the opening or on top of the curb (if applicable).
- Align and Secure: Ensure the skylight is properly aligned and centered. Use screws or nails (as specified by the manufacturer) to secure the skylight to the roof or curb. Be careful not to overtighten the fasteners, as this could damage the skylight.
- Check for Level: Use a level to ensure the skylight is perfectly level. Make any necessary adjustments before proceeding.
Flashing and Sealing
Proper flashing and sealing are absolutely crucial for preventing leaks and ensuring the longevity of your skylight. This is where you want to pay extra attention to detail.
- Install Flashing: Install the flashing around the skylight according to the manufacturer’s instructions. The flashing should overlap the skylight and the surrounding roofing material to create a watertight seal.
- Apply Sealant: Apply a generous bead of roofing sealant to all seams and edges of the flashing. Smooth the sealant with your finger or a putty knife to create a clean, even seal.
- Inspect Carefully: Thoroughly inspect the flashing and sealant for any gaps or imperfections. Repair any issues immediately.
Finishing Touches
With the skylight installed and sealed, it’s time to add the finishing touches.
- Install Interior Trim: Install any interior trim around the skylight opening to create a finished look.
- Clean the Skylight: Clean the skylight glass with a mild soap and water solution to remove any dirt or debris.
- Inspect the Installation: Carefully inspect the entire installation for any potential issues, such as leaks or loose fasteners. Address any problems immediately.
Common Skylight Installation Problems and Solutions
Even with careful planning, problems can occasionally arise during or after skylight installation. Here are some common issues and how to address them:
- Leaks: The most prevalent issue is leaks, often stemming from improper flashing or sealing. Meticulously inspect the flashing for any gaps or damage, and reseal as needed to ensure a watertight barrier.
- Condensation: Condensation may occur on the inside of the skylight, especially in environments with high humidity. Improve ventilation within the room to mitigate condensation buildup.
- Improper Fit: If your skylight isn’t fitting properly, double-check your measurements against the manufacturer’s specifications to ensure accuracy. You may need to make slight adjustments to the opening for a secure and precise fit. Need expert assistance? Call us today! Our team can help ensure a perfect skylight installation for your home.
Skylight Maintenance and Care

Proper maintenance and care are essential for maximizing the lifespan and performance of your skylight.
- Regular Cleaning: Clean your skylight at least twice a year to remove dirt, debris, and algae.
- Inspect for Damage: Periodically inspect the skylight for any signs of damage, such as cracks, leaks, or loose flashing.
- Re-seal as Needed: Re-seal the skylight every few years to maintain a watertight seal.
Enjoying Your New Skylight
Congratulations! You’ve successfully installed a skylight on your flat roof. Now, sit back, relax, and enjoy the enhanced natural light and ventilation in your home. A skylight is a valuable addition that can significantly improve the comfort and beauty of your living space. If you ever have any problems or need assistance with maintenance, remember we’re just a call us away! Consider adding solar shades to control light levels.
Frequently Asked Questions (FAQs)
How much does it cost to install a skylight?
The cost of skylight installation can vary widely depending on factors such as the size and type of skylight, the complexity of the installation, and your geographic location. Generally, you can expect to invest between $500 and $2000 for professional installation services. Opting for a DIY installation can potentially save on labor costs, but it necessitates meticulous planning and precise execution.
Do I need a permit to install a skylight?
In most jurisdictions, obtaining a building permit is a prerequisite before undertaking any skylight installation project. Reach out to your local building department to ascertain the specific permit requirements applicable in your area.
How often should I clean my skylight?
To keep your skylight in optimal condition, it’s recommended to clean it at least twice a year to remove dirt, debris, and algae buildup. Use a mild soap and water solution along with a soft cloth or sponge to gently clean the surface without causing damage. For professional skylight maintenance and cleaning services, contact us today! Our experts ensure your skylight stays clear, bright, and in top shape year-round.
